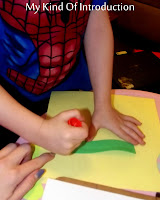
Hand Print Flower
A couple days ago I was trying to figure out something to do with the 3yr old little boy that I babysit during the week. He's not really that much into coloring (a 3 yr old that don't like to color! CRAZY). The one thing that I could work with is that he's a mama's boy. So I got to thinking.... I sat for a while on my bed, my brain was wore out but I finally came up with a simple but fun idea that I was sure he would enjoy.
Since Spring is almost here.....
We made a Hand Print Flower for his Mommy!
What you need:
A few sheets of Colored Paper
We used Green, Yellow, White and a Decorative Piece for the flower
Glue
Scissors
Pencil to trace with
Here's how we made it...
I started out by tracing 1 of his hands on a piece of paper. We used ONLY his right hand so the fingers would be going the same way.
(He would only let me trace it twice so I had to trace the paper hand the rest of the times.)
Cut out the hands. 6 hands worked for us but it may vary depending on the size of the hand print used.
(Instead of tracing the hand 6 times you could stack 6 pieces of paper together and cut them all at once if you can hold all the fingers in place.)
Draw out a couple green leaves and a yellow circle (for the center of the flower)
Cut out the leaves and Flower center
I had the stem piece from another project but you can cut a rectangle from green paper.
Start by gluing on the Stem
Start adding the hands. I laid the circle center down to see where I needed to start the hands then I removed it and started gluing on the 'flower petals'
Hayden was super excited when we finished the flower!! He wanted me to take a picture of him and his mommies flower so here it is!!!
In the center of the flower I wrote a little message that said "I love you Mommy"
His mommy LOVED it!!
SUCCESS!!
This is a wonderful project for toddlers but I'm pretty sure that my daughters would enjoy making a Hand Print Flower aswell and they are almost 6 and 7yrs. old!


No comments:
Post a Comment
I'd love to hear from you...