Creative Commons License
This work is licensed under a Creative Commons Attribution 3.0 United States License.
Showing posts with label Kids craft. Show all posts

Saturday, March 30, 2013

FREE eBook Full of Easter Crafts for Kids


I downloaded this FREE eBook last night and I found all kinds of easy and very cute Easter crafts for me to do with my daughters! I can't wait to get started!


Free eBook: Kids Crafts for Easter:
How to Decorate Easter Eggs, Easter Egg Hunt Projects, and more Easter Activities for Kids features 28 pages of our favorite homemade Easter projects + Crafty Kid Creations eNewsletter for FREE!
Click Here


Saturday, March 2, 2013

Hand Print Flower Craft


Hand Print Flower

A couple days ago I was trying to figure out something to do with the 3yr old little boy that I babysit during the week. He's not really that much into coloring (a 3 yr old that don't like to color! CRAZY). The one thing that I could work with is that he's a mama's boy. So I got to thinking.... I sat for a while on my bed, my brain was wore out but I finally came up with a simple but fun idea that I was sure he would enjoy.
Since Spring is almost here.....
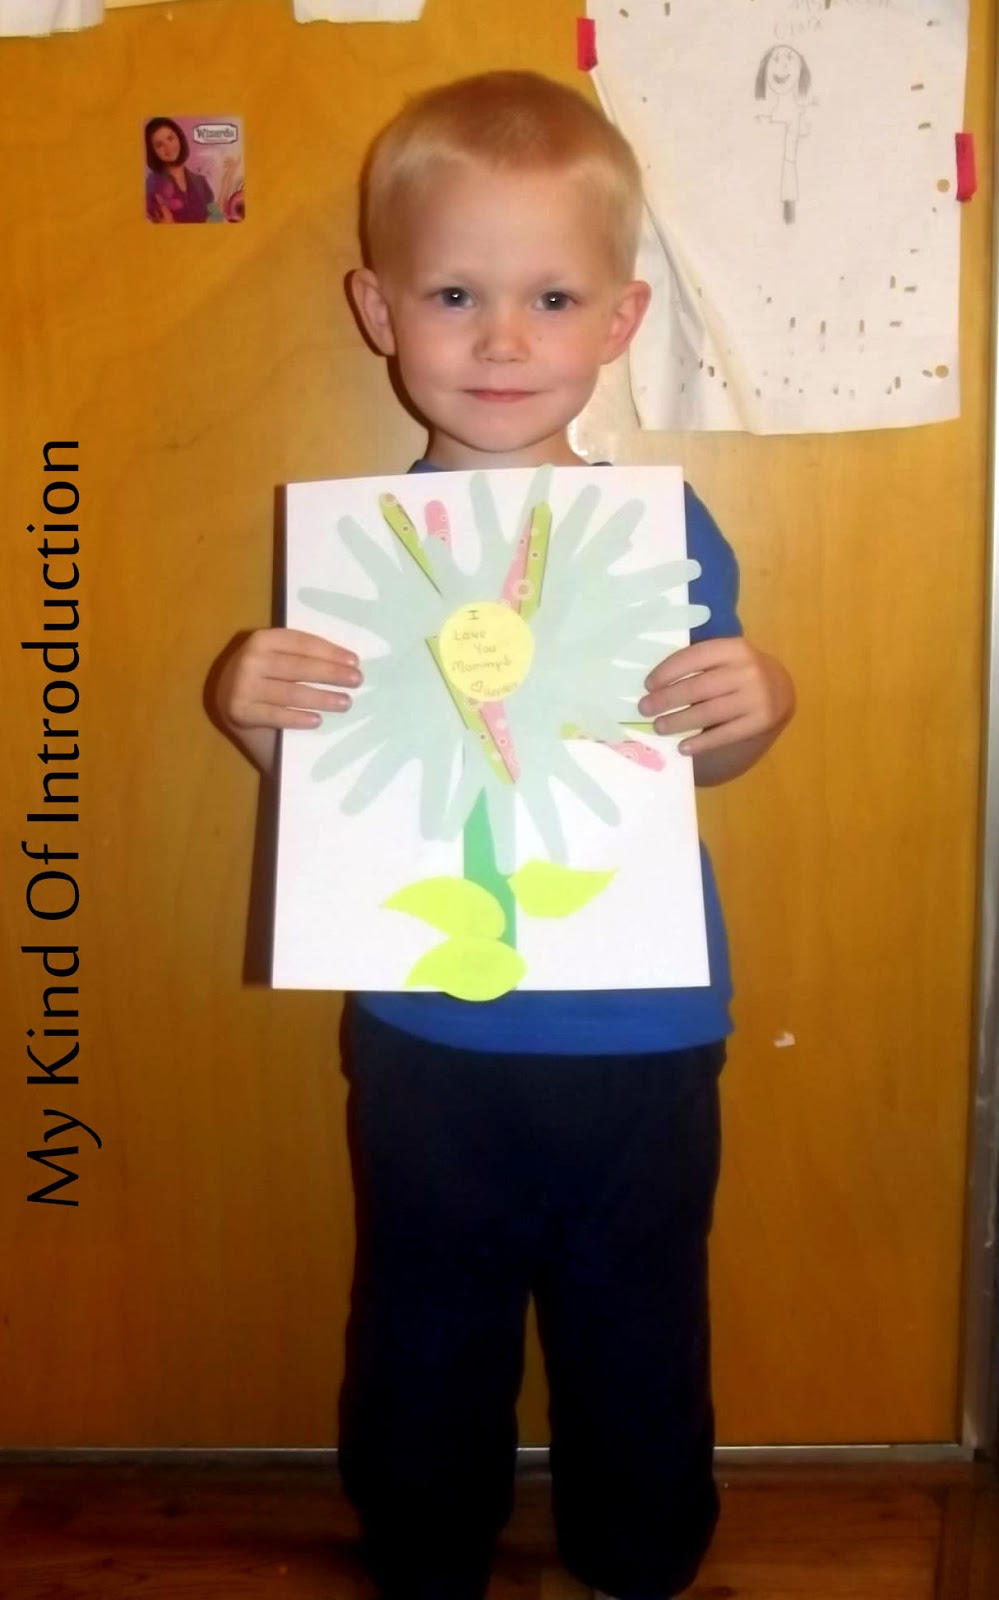
We made a Hand Print Flower for his Mommy!


What you need:

A few sheets of Colored Paper
We used Green, Yellow, White and a Decorative Piece for the flower 
Glue
Scissors
Pencil to trace with

Here's how we made it...

I started out by tracing 1 of his hands on a piece of paper. We used ONLY his right hand so the fingers would be going the same way.
(He would only let me trace it twice so I had to trace the paper hand the rest of the times.)


Cut out the hands. 6 hands worked for us but it may vary depending on the size of the hand print used.
(Instead of tracing the hand 6 times you could stack 6 pieces of paper together and cut them all at once if you can hold all the fingers in place.)


Draw out a couple green leaves and a yellow circle (for the center of the flower)


Cut out the leaves and Flower center


I had the stem piece from another project but you can cut a rectangle from green paper.


Start by gluing on the Stem


Start adding the hands. I laid the circle center down to see where I needed to start the hands then I removed it and started gluing on the 'flower petals'


Hayden was super excited when we finished the flower!! He wanted me to take a picture of him and his mommies flower so here it is!!!


In the center of the flower I wrote a little message that said "I love you Mommy"
His mommy LOVED it!!

SUCCESS!!

This is a wonderful project for toddlers but I'm pretty sure that my daughters would enjoy making a Hand Print Flower aswell and they are almost 6 and 7yrs. old!


Saturday, February 9, 2013

DIY Pirate Valentines for Kids


Books and Coloring Books


The count down to Valentine's Day has started in my house. My little girls are ready to bring Valentine's to all their little school friends. 5 More Days! On February 14, my youngest daughter, Jade, has to dress fancy and wear her best dress for 'Ladies and Gents Day'. The teachers are going to teach the kids manners. My oldest, Loran, did 'Ladies and Gents Day' last year when she was in Kindergarten and I think it's simply adorable :-)


I have another Valentine Card Craft for your kiddo's! This one is for the Pirate Lovers!!
Arggggggggg!


While searching the web a few weeks ago I ran across a blog that had a printable template for these Pirate Valentines but my printer is out of ink so I couldn't print anything out.
Here's the original post and the photo below 


So I tried my luck at free-hand drawing the little pirates! Mine didn't turn out just like the original, I left some stuff out and did things my way but I love the way they cam out!
Here is what I came up with and How I did it


What you will need
Card-stock or Old Valentines
Glue
Markers
Pencil
Scissors
Small Heart Sticker or Small Fabric Heart
White Paper optional


Cut out a square or rectangle out of cardstock in the size and shape you want your valentine.
I used old Valentine's from last year traced them on plain white paper. If your using cardstock you don't need to trace onto more paper. (I traced them twice because my paper was thin and I didn't want to see the design on the card through the paper)


Since I used thin paper, I glued one layer of paper to my valentine, you may skip that step.
Draw a 1/2 circle like the photo below


Add Hair, I did pigtails like the original


Finish the top of the circle for the Bandana


Draw on the bandana (or Pirate hat if your making a boy). Add a face and decorate.


I used markers to color in a little bit on the pirates and wrote a pirate saying at the bottom.


You can either cut out a heart out of fabric or use a heart sticker that is bigger than the eye you drew. Stick or glue the heart over one eye and use a colored pen to draw the strings.


Here are my Pirate Kid Valentines! Aren't they cute?!
I'm very happy with hoy they came out and so are my girls!!


Have fun making your own Pirate Valentine's!


FREE Valentine Printables for Kids


Through Valentine's Day (February 14th), Frecklebox is offering FREE printable (and customizable) Valentine's Day cards for kids in addition to their FREE coloring pages, which they offer year round. The Valentine's Day cards are great for kids to bring to school, give to friends or decorate for family members. . Kids can personalize, download, print and get creative!  You can learn more about the offer by clicking here!


Free Valentine's Day Cards


Books and Coloring Books

Tuesday, February 5, 2013

Make a Valentine's Bookmark ~ Kids Craft

Find unique gift baskets for any occasion at Arttowngifts.com.


DIY Valentine's Day Bookmark ~ For the Kiddo's!

Valentine's Day is just 9 days away and soon kids will be taking all their little friends Valentines to school. Why not mix things up this year? Instead of buying Valentines this year, why not make them? I have a few projects for Valentine's Day, you can find them at the bottom of this post. How about Valentine's Day Bookmarks? They're easy enough that your kids could make them for their classmates as Valentines! You can even add a photo to them!


All you need is:
An empty cereal/gummy box
2 Colors of Construction Paper (We used red and pink)
Glue
Scissors
Small Photo (optional) 

*Crafty Tip* ~ If you have old bookmarks laying around the house, you can use those instead of the box but you will still need the cardboard for the heart.


Cut a rectangle in the size that you want. (I used a credit card to measure the width and left the length as the size of a normal sized gummy box - 5 1/2 to 6in is a good bookmark size) 


Cut a Heart shape that is a little bit bigger than the width of your bookmark. 
Trace your bookmark shape onto the color of paper you chose. If your bookmark has writing or pictures on both sides and you don't want those pictures to be a part of your finished bookmark then trace the bookmark twice, side by side. Make sure you have a double bookmark drawn onto your paper (Like the photo)

 Trace your heart onto the color of  Paper you chose. It's best to trace it twice. One on each side (trace once, flip it and trace again) so that your colored paper will fit perfectly on both sides of your heart. 
Glue the paper to your templates. Make sure that if you doubled your bookmark color then you need to fold on the center line and glue the bookmark in between the fold to cover the whole rectangle. 


 Glue your heart to the top of your bookmark.

 You can leave it the way it is now and be finished or you can decorate it.
 If you would like to add a photo then all you have to do is cut a small rectangle that covers your photo and fits on your bookmark. 
Cut a small square in the center of your  rectangle and place it over your photo. (You just made a frame)

Glue the photo to your bookmark (acid-free glue works best with pictures) 
Once your photo is glued down, glue the 'frame' over your picture and your DONE!! 
This craft takes all of about 10 or 15 minutes and it helps get kids wanting to read so they can use their new bookmark!  


Other posts you may enjoy!

 Getting Ready for Valentine's Day
 Easy To Make Valentine Rings out of Chocolate Kisses
Valentine's Day Heart Dog Craft


Give the gift that last for a lifetime. Gold dipped roses from Arttowngifts.comNeed a Valentine's gift for that special someone in your life? Or do you want to get your kids a one of a kind Valentine's Gift that they will never forget? Check out what Art Town Gifts has to offer this Valentine's Day! The prices are great and I LOVE the look of the Gold Dipped Roses!

Valentine Cookie Bouquets and Bakery Treats

Gold Dipped Roses

Valentine Gift Basket Towers and Wine Gifts

20% Off Already Reduced Valentine's Day Cards and Party Invitations at Tiny Prints

Join The Treat Card Club - Save More Than 40%


Monday, February 4, 2013

Making a Post Card from a Gummie Box

Valentines Day Greeting Cards from Treat


Home-Made Postcards!


I don't know about you but I love getting mail! Of course I don't love getting bills but regular mail like products I buy, samples and maybe even the letter or 2. Not many people use snail-mail anymore, it's all went to email and facebook messages. Even though online mail is more convenient, getting mail in your mail box is more fun. My little girls light up when they check the mail box and find something with their name on it. That's how I came up with the idea to send postcards to their friends and family. But who wants to go to the gas station and buy some of those lame local town postcards for your kids to send out? You can't find cool postcards anymore. Why not make your own? You can get creative and make any postcard you like! The easiest way to start making your very own postcards, is to grab an empty Gummie Fruit Snack box and cut it to size.

Crafty Tip ~ A Standard postcard measures between 3 1/2 x 5 inches and 4 1/2 inches x 6 inches. Anything sent postcard-style (no-envelope) that measures differently or is not rectangular needs first-class postage.

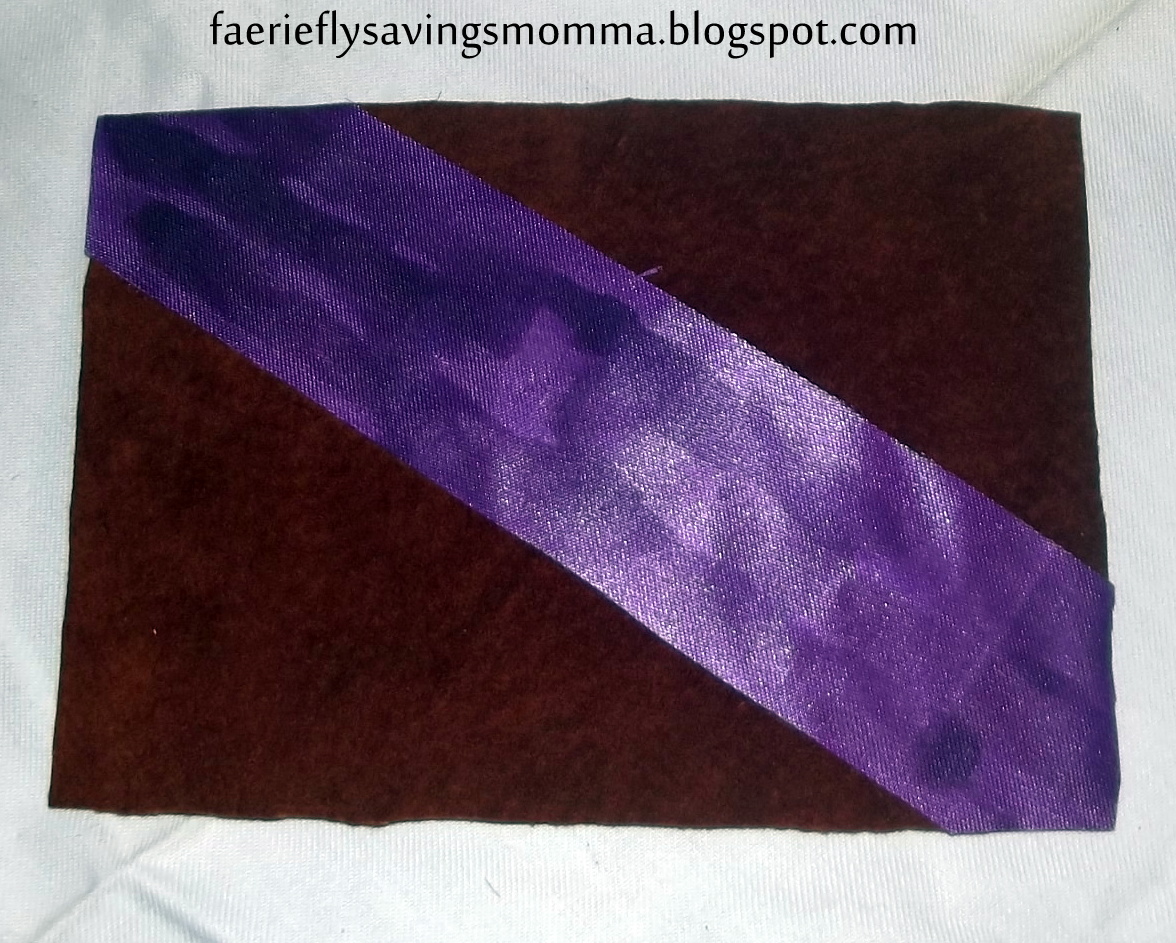
While my kids were playing outside today, I decided to make my own postcard. I went to my craft bag and found some soft brown fabric, that I had left over from a Halloween costume I made for my best friends son, and some purple ribbon. I wasn't sure how those 2 colors were going to work together but I was being open minded. It turned out to be very classy like!
I took pictures as I made the post card....

I started with a gummie box and cut out one side of it


 Then I measured out a 6 inch by 4 1/4 inch rectangle


 I cut out the postcard and traced it to the back of my fabric


After I traced and cut out my fabric, I glued the fabric to my postcard and trimmed off the raw edges


Time to move on to the Ribbon!


I cut a small piece out of the middle of my wide ribbon and decided to glue it across my postcard. (From one corner to the other) And cut off the edges


After the glue dried, it was time to flip over my postcard and add the stamp words and address lines.

I did a google search and found a nice template for the back of a postcard.

www.designedlykristi.com
My post card


You can use old T-shirts, stickers, googly eyes, lace, Or just for fun, If your cardboard piece has a cool design on it already then you can just add the words and lines to the back and mail it that way (I made one out of a baby formula label back when my girls were babies!)

If your going on a trip soon, this would be a fun project for you to do with your kids before supper! You can get some of the cheap postcards from the gas station along with a road map or odd food labels from the area your visiting. Just cut the map or food labels to the size of the post card and replace the store bought image with an awesome travel image of your own!! What a wonderful way to tell your family and friends about all the fun your having on your trip!


Stuff4 Crafts

Get great prices on some of these wonderful products below! I have to get me one of these cupcake punchers!! I LOVE IT!!!! (Click on the photo's if you would like to know more about them) :0)


Clearsnap Double-Sided Adhesive Stickers 2"X7" Sheets 4/Pkg-Be Mine