Creative Commons License
This work is licensed under a Creative Commons Attribution 3.0 United States License.

Thursday, August 16, 2012

Crock Pot Apple Butter

 
 CROCK POT APPLE BUTTER
 
Living in the south (North Carolina), you have to have alittle taste of the mountians! What better way to taste the Appalachians then to make some Yummy Apple Butter!?

Pinned Image
 
Approximately 3 lb. apples
3 cups sugar
2 tsp. cinnamon
1 tsp. nutmeg
1/2 tsp. allspice
1/2 tsp. cloves
Dash of salt
3/4 cup water or fresh apple cider
 
Fill Crock-pot 3/4 full with peeled, cored and sliced apples. Add the remaining ingredients and stir until evenly mixed. Cover and cook on low setting overnight or until the butter is of a thick, spreadable consistency.If apple butter has too much liquid, remove lid and cook on high until thickened. Stir often as butter thickens to prevent scorching.
Store in refrigerator for up to 6 weeks. Freeze for longer storage.
Variation: For a less sweet apple butter, substitute 1 cup honey for the sugar.
To can the apple butter, pack into hot jars leaving 1/4-inch headspace and process in a boiling water bath for 10 minutes.


Recipe found at Cooks.com

Make your own Pre-Sliced Apples that don't go Brown

18022_Food Network - Only at Kohl's!

No-more Brown Sliced Apples


Those packages of pre-sliced apples you can buy at stores are a great healthy snack for lunches and school snacks, but it can get pricy!
Make your own by slicing apples, soak in cold water for 3-5 minutes, then soak in a lemon-lime carbonated soda (such as 7-up or sprite) for 3-5 minutes. Divide into snack size portions and store in Ziploc bags in the fridge. The lemon-lime soda will keep the apples from browning and make them last longer
307728_Save Better - 180x150

Orange Creamsicle Fudge


When I think of my childhood, I can't help but think about sitting around eating some Creamsicle's!  The yummy orange ice-cream with a white, not quite frozen, cream filling! It makes my mouth water just thinking about it :) How about a wonderful little recipe for Creamsicle Fudge! A new twist to the same yummy taste! 

(This would be good in Kids lunches or for Snack. You could even take a whole batch to your child's class and let all the kids enjoy!)


Orange Creamsicle Fudge

Ingredients:


  • 6 -ounces (1.5 sticks) butter 
  • 2- cups granulated sugar
  • 3/4- cup heavy cream 
  • 1- package (12 oz) white chocolate chips 
  • 1- jar (7 oz) marshmallow cream (or fluff) 
  • 1- tablespoon orange extract 
  • orange (or a combination of red and yellow) food coloring 

Directions: 


  • Prepare a 13x9 pan by lining it with aluminum foil and spraying the foil with nonstick cooking spray.
  • In a large heavy saucepan, combine the sugar, cream, and butter over medium heat.
  • Continually stir the mixture until the butter melts and the sugar dissolves.
  • Brush down the sides with a wet pastry brush.
  • Bring the mixture to a boil, and once it starts boiling, stir continuously for four minutes.
  • After four minutes of boiling, remove the pan from the heat and immediately stir in the marshmallow cream and white chocolate chips.
  • Stir until the white chocolate has melted and the fudge is completely smooth.
  • Working quickly, pour about a third of the white fudge into a bowl and set aside.
  • To the remaining fudge, add the orange extract and orange food coloring, stirring until it is a smooth, even color. It is important to perform these steps quickly, because the fudge will start to set if you take too long, and the end result will not be smooth
  • Pour the orange fudge into the prepared pan and spread it into an even layer.
  • Drop the white fudge over the top by the spoonful, then drag a table knife or toothpick through the fudge to create orange-white swirls. You can spray your hands with nonstick cooking spray and gently press them into the top to smooth out the swirls, if desired.
  • Allow the fudge to set at room temperature for 2 hours, or in the refrigerator for 1 hour.
  • To cut, pull the fudge out of the pan using the foil as handles.
  • Use a large sharp knife to cut the fudge into small 1-inch squares.
  • You can store Orange Creamsicle Fudge in an airtight container in the refrigerator for up to a week
  • Bring it to room temperature to serve.

ENJOY!!!!!!!!!!!

Tuesday, August 7, 2012

Back To School Supplies


On August 16, I will officially be a mother of nothing but school kids! My youngest daughter, Ciara, is starting Kindergarten this year. (I'm not too happy about that part of the situation) I am excited about having a few hours each day to myself..... kid-less!! (That don't happen too often..... babysitters are VERY rare!) My oldest daughter will be starting 1st grade! My girls are 5 and 6, they have recently decided that they are “stylish girls”. Dangly earrings, dresses, sparkly clothes etc. Jade, my 5 yr old, told me today that she wanted girly pretty clothes for school. Loran, my 6 yr old, is all about skirts and dresses here lately.... mainly skirts. On top of clothes shopping, that I haven’t even started yet, there is the school supply shopping. I don't know if it's just me but it seems like every year the supply lists keep getting longer! I understand that the teachers have to pay for a lot of the classroom supplies and every little bit helps but why would each kindergarten kid need to bring 5 glue-sticks? That's 120 glue-sticks per classroom if there are at least 24 kids in the class! *That's ALOT of glue-sticks* Yesterday I was able to get almost everything on my daughters supply lists. Below is my girls' School Supply Lists:

Jade's Kindergarten Supply List
Purple shows what I bought
Black shows what I haven’t bought yet

1 Backpack (large enough for a paper folder) *Last yr I bought too small of a packpack... I did better this time :0)
1 Small Towel for Napping
Tennis Shoes for Play
Jacket for Cool Days
Baggie with a Full Change of Clothes (labeled with name)
1 Box of Crayons (16-24 count)
5 Small Glue Sticks
1 Pencil Box
1 Box of #2 Pencils
1 Plastic Folder with Prongs (any color)
1 Composition Book

Optional Items:
Additional glue sticks
Dry Erase Markers
Stickers
Teacher Box Toys
Watercolor Paints
Hand Sanitizer
Disinfectant Wipes (ex. Lysol wipes)


Loran's 1st Grade Supply List
Pink Shows what I bought
Black show what I haven’t bought yet

1 Backpack
1 Extra Large Stick
1 pkg. Pencils
1 Large Eraser
1 Box of Crayons (16-24 count)
1 Spiral Notebook
2 Durable Plastic Folders with Brads & Pockets (blue and red)
1 Small Pencil Box
1 Small pair of Safety Scissors

Optional Items:
1 Box of Tissues
1 Bottle of Liquid Soap
1 Box of Gallon sized Ziploc Bags
1 Box of Quart sized Ziploc Bags

Yesterday we spent almost $50 on school supplies, 45.56 (minus some bath soap and 2 cups that were on sale)!! Which is a lot more than I thought we would spend. That didn't even include the back pack and shoes! I was planning on going to Office Max to get the supplies but we ended up going to K-Mart instead. Most of the supplies were on sale. I completely forgot about buying towel, so I guess we did pretty good since the towel was $11.69. Ciara picked out a really cute Hot-Pink polka dotted towel with a black trim. It's very adorable!! Jade is normally a purple girl but this towel is just to cute not to love! I was even able to buy 2 things for Jade's kindergarten Treasure Chest! I got a little paint by number set and some mini star sticky notes. Good thing this weekend was No-Tax Weekend!!

We're planning on buying the school clothes next week. I've been collecting pants for the girls from where my friend's daughter has grown out of most of her clothes! 90% of the clothes that I got from her were either never been wore of barley worn so Loran was able to get a few pairs of pants and a couple shirts without me even buying anything yet. But of course...... I have to buy skirts, leggings and stylish shirts. My girls also need some dress shoes and REAL earrings! Their ears get red and sore when they wear fake earrings so I have to buy them some silver ones to wear to school their holes don't grow up. It hasn't even been a year since they got them pierced so I can't leave them out for to long.
Looks like I still got a few long shopping days to go before I can relax at home and enjoy some kid-less hours!! The excitement is starting to bubble up in my tummy!! I sure hope my little Jade does good and don't get scared and shy on her 1st day of school. I'm sure I'll cry a bit but maybe not too much! :)
(I only cried a tiny bit when Loran started school and I was able to wait until I made it to the car and I also hid it from my fiance..... I think I hid it anyway)


Sunday, August 5, 2012

Buffalo Chicken Garbage Bread


Buffalo Chicken Garbage Bread. Ingredients 2 boneless chicken breasts 1 tsp. olive oil 1 pizza dough (use store bought and let it sit out for about 20 minutes) 8 oz. of shredded mozzarella cheese (I used part skim) 3 oz. of shredded cheddar cheese 1/2 cup of Franks Wing Sauce 1/3 cup of ranch or blue cheese

Pizza Balls


I ran across this awesome recipe a while back and had to share. I changed the words below a bit, I had lots of people wanting to know what to do with the sauce so I've now added that to the recipe. 

I'll add my own photo soon!!


ENJOY!!!


PIZZA BALLS!

3 cans of Buttermilk Biscuits

Pepperoni slices
Block of your chosen of Cheese
1 beaten egg
Parmesan
Italian seasoning
Garlic powder
1 jar pizza sauce


Cut up the block of cheese into squares.

Flatten biscuits out & stack pepperoni and cheese in the middle.
Gather the edges of the biscuit and secure on top.
Lay the rolls in a greased pan.
Brush with beaten egg.
Sprinkle with Parmesan Cheese, Italian seasoning and/or garlic powder.
Bake at 425°F for about 20 minutes or until Golden Brown
Use the Pizza Sauce to dip your Pizza balls into!

EAT UP!!!!


Recipe found at The Gunny Sack


Saturday, August 4, 2012

Rainbow Drink


Pittman & Davis

This is a cute idea for kids who like alittle color in their life :0)


Make colored ice cubes (with kool aid or juice)
stack in tall glasses (about 2 or 3 of each color) and pour in Ginger Ale or Sprite

Saturday, July 28, 2012

Who is this girl?


Can you tell me who this young girl is??


Need a hint? ~ She was born in Honolulu, Hawaii in 1967
....................................................................
...........................................................
.................................................
.......................................
............................
.....................
............
.....
..
.
..
.....
..........
................
......................
.............................
...................................
.........................................
...............................................
......................................................
............................................................

Figured it out yet??????

Nicole Kidman

Tuesday, July 24, 2012

The Original Waterball game


On a hot steaming day like today, a game with the name "Waterball" sounds like a wonderful idea, don't it? What is Waterball you ask? Well... Waterball is a game that firefighters started playing back in the 1940s that helped them with their aim of the water and with using team-work while controlling the water hoses.
Fire Departments went head to head, shooting a strong stream of water from their fire hoses at a yellow ball strung on a string above them. Which ever team got the ball moved over to the other team's side, Wins the game!! Every now and then, a town will decide to throw a Waterball Tournament! The the Firefighters get to have some fun while also training!
 

How cool does that sound? Man I wish I could play!! Maybe I can make up a home version of the game!!!!!!!
Here are a few pictures of Waterball from between the 1940s and the 1960s, along with a few videos from the 2000s
Edina Fire Department

Edina Fire Department

Memphis Fire Dept hosted its 2008 Waterball Contest to a win by Richmond Lenox EMS for the 8th year in a row.

Rockford firefighters

 http://www.watertowndailytimes.com/apps/pbcsi.dll/bilde?Site=WD&Date=20110801&Category=NEWS05&ArtNo=708019962&Ref=AR&maxw=500&maxh=375
Firefighters beat the heat with memorial waterball tournament.
watertowndailytmes.com


Sunday, July 22, 2012

A Poem I Once Wrote.......

As I sit here tonight,
Wishing your were here,
Knowing your happy,
Right where you are,
I could of been in her place,
But chose to stay,
I couldn't move my kids...
To live under that place.
I love my life...
But can't help but think,
Think about all that got left behind,

The Future,
The Past,
The Present and Beyond,
Puzzle pieces that don't all belong.
Some square,
Some round,
Some oval,
Some wild.
All with one purpose...
The purpose of me.
The things that were mine...
Some that still are,
Everything that I've lost,
All that I've gained.
The twists of my life
With the happy and the sad,
With the ups and the downs,
It all adds to one thing.......
And that thing is Success.............
Or was that depressed??

Saturday, July 21, 2012

Movie Theater Shooting


I saw this picture on my facebook wall and I couldn't help but want to add it to my page! My heart goes out to all the victims of the Movie theater shooting that happened Friday night at 12:30am. Those people were just wanting to watch their favorite movie premier and got hurts for it, some even lost their life's! They were alot of kids hurt in that shooting that did not deserve it. Christian Bale would be making those little kids dreams come true if he went and seen them in his Batman suit! Give those kids something to smile for, give them hope! Everyone who got hurt or lost someone are in our prayers!

Wednesday, July 18, 2012

DIY Shurg Shirt

I found this DIY Shrug Shirt online and I'm so excited about getting some old T-Shirts and making these for me and both my little girls!!! I'll post pictures as soon as I make one!! If you make one PLZ post pictures so I can see them!! :0)

Step 11. Grab a Shirt

Step 22. Cut along the dotted line and cut off neck band.


Step 33. Turn shirt inside out and fold in 1 inch to form the casing

Step 44. Pin and Sew


.5. Pull the ribbon through the casing using a safety pin. Pull tight and tie.

Strawberry Snake


Strawberry Shortcake Snake


Strawberry Snake!

What you'll need

  • SHORTCAKE BISCUITS:
  • 2 cups all-purpose flour
  • 2 tablespoons confectioners' sugar
  • 4 teaspoons baking powder
  • 3/4 teaspoon salt
  • 1/2 cup margarine (1 stick)
  • 1 cup milk
  • STRAWBERRY FILLING:
  • 1 quart strawberries
  • 4 tablespoons confectioners' sugar
  • WHIPPED CREAM TOPPING:
  • 1 cup whipping cream
  • 2 tablespoons confectioners' sugar
  • GARNISHES:
  • 4 whole strawberries
  • Green fruit leather
  • Mini chocolate chips or M&M's
1. Heat the oven to 400 degrees. Sift together the flour, sugar, baking powder and salt into a large mixing bowl. Cut in the margarine with a pastry cutter. Or use a vegetable grater to grate the stick into the mixing bowl and let your kids take turns blending the margarine into the dry ingredients with their fingertips. Once the dough is crumbly, slowly stir in the milk.

2. Turn out the dough onto a floured working surface and gently roll or pat the dough into a 1-inch-thick rectangle (it should measure about 6 x 8 inches). For the best results, handle the dough as little as possible.

3. Slice the rectangle into four 1-1/2- x 8-inch strips. Place the strips on an ungreased baking sheet, then let your child mold and curve them into S shapes that resemble snakes. Bake for 10 to 12 minutes until the bottoms are golden brown. Transfer the baked shortcakes to a wire rack (a parent's job) and let cool. Carefully slice the cooled shortcakes in half lengthwise or split them with a fork and then set aside.

4. Wash the strawberries and let your kids select four to use for the snakes' heads. Slice the rest of the berries lengthwise into a mixing bowl. Toss with the confectioners' sugar and let stand while you prepare the whipped cream.

5. Combine the whipping cream and confectioners' sugar in a chilled bowl and beat with an electric or hand mixer until stiff peaks form.

6. Just before serving, arrange berries on the bottom half of each shortcake, then cover with the shortcake top. Spread on whipped cream and add a layer of sliced strawberry "scales."

7. For the snakes' heads, cut mouth openings in the tips of the whole berries and place one at the end of each shortcake. Press a pair of mini chocolate chip or M&M's eyes into the sides of each head and add a forked tongue cut from green fruit leather. Serves 4.

Sunday, July 8, 2012

WLOS ABC 13 - Will You have Internet on Monday?

WLOS ABC 13 - Western North Carolina's News :: News - Top Stories - Will You have Internet on Monday?


Have everybody heard about some people losing their internet tomorrow, Monday? Apparently in 2011  a virus was set out to steal IP addresses. The government busted the people behind it and built lots of new servers to fix what the hackers had "rewired". But now they are closing down the back up, which means that if your computer is infected with the virus that was let out in 2012, then your computer will not be able to access the internet on Monday! There is a way to fix it. Below is an article I found on my local news webpage. Check it out and then click the link to make sure your computer stays in working order!!

Will You have Internet on Monday? When the computer trojan virus, DNSChanger, creators were arrested over 8 months ago the FBI began shutting down domains that may have been affected by the DNSChanger malware.
The virus, which has been circulating the web from as far back as 2007,redirects internet traffic to sites with paid advertisements where cybercriminals can hack into unprotected computers.
Authorities say some 275,000 computers are still at risk.   
On Monday, the FBI's temporary Internet servers will go dark, leaving thousands of unsuspecting malware-infected individuals without online access.

Is your computer safe? Click here to check with the NS Changer Working Group (DCWG)
For a list of other safety tools, click here

Mini Lightning Bug Jars

Outside Summer Fun
Whats more fun than running around outside on a summer night chasing lightning bugs?? Catching them and putting them in jars for safe keeping! Most of the time you would use one of the gallon mason jars... I have a new idea for you. How about Mini Lightning Bug Jars? Easy to hold in small hands and not likely to be dropped when running thru the yard. These can be made by the child, with your help with the knife, or you can make them for your kids yourself. The choice is yours!!!!!!

All you need is :
  • Baby Food Jars
  • Knife (Adult help/supervision is needed for putting the holes in the lid with knife.)
  • Permanent Markers *I used black and orange for stars and fireflies*(optional)
  • Stickers (optional)
Instructions :

Step 1 -->  Make sure the jars are clean and dry.

Step 2 -->  Get an adult to poke holes in the top of the lid so the lightening bugs can breath.
**If you would like then your jar is finished. Or you can go on to Step 3**

Step 3 -->  Write your name on your jar if you would like and decorate with stickers or draw fireflies with black and orange markers.


**Our Finished Lightning Bug Jars!!!!**


Saturday, July 7, 2012

4th of July in Downtown Asheville!

Our Family's Fourth of July Fun!!!
 
The words with a * after them have more information about that place to item at the bottom of this blog.

Brooklynd and Ciara chasing Pigeons!
This Fourth of July, my family and I decided that we were going to Downtown Asheville* for the Ingles Fourth of July Celebration in Pack Square*. We got downtown alittle after 4:30pm (the festivities started at 4pm) It took us FOREVER to find a parking spot! That's the thing about downtown Asheville*, they don't have very many places to park and the spaces that are available cost! I'm a country girl, born and raised in Candler, which is right outside Asheville*, I'm use to parking lots that are free to park in. Not parking lots that have a guy sitting at the entrance asking for my money to park in one of the spots!! I'm also not a fan of putting money in one of those little meters and having to run back to your car every hour or so to add more money if you aren't done shopping/walking around. So we ended up parking in the Bank of America parking lot because I saw a sign that said "FREE parking for Bank of America Consumers Only!" Well the bank may not of been open at the time but Yes, we are Bank of America consumers and if anyone would of said anything to us we were planning on swiping out out bank cards and showing them the sign :0) The Celebration Grounds* were alittle over a mile from where we parked so we had to walk a bit. The kids didn't seem to mind. My daughters started chasing Pigeons!! The pigeons would just walk the streets and not budge when you walked past unless you were just a bit to close or coming after them lol! Brooklynd kept chasing them, she wanted to catch her a bird! She told me that she was going to safe it! I truly have no idea what that pigeon would of needed saving from except from her and her sister!! :0)

My girls with their butterfly wings, Aj was still waiting on his dog.


The balloon guy making Aj's balloon.
Once we got closer to Pack Square*, we saw this guy who had a flower balloon on his bead and a apron full of balloons around his waist! He was making balloon animals and such for tips. Brooklynd, Ciara and Aj HAD to have a balloon so we stopped. The girls ended up with Butterfly wings while Aj got a dog on a leash. Then off to the festivities we went! The first thing the kids seen was a big blow up slide! Before the kids could get on the slide we had to sign a weaver and get them a bracelet, so we did.. Easy Peasy! They all went on the slide (my youngest got scared and climbed back down the latter but the other 2 had fun) I was a bit upset to find out that Splashville* was closed :0( They had live music set up on the new walkway/stage they recently built in front of the court house, so the sound guy and all his buttons and such, were set up st the back of Splashville, where all the water should of been coming up. It ended up being a dance stage for all the kids to play and dance to the music on. These 3 young girls, I'd say they were between the ages of 8 to 10, came out onto Splashville platform with hula-hoops. And next thing I know they are hula-hooping to the music! I have to say, that I think of myself as a pretty good hula-hooper even though I'm 24 :0) But these girls had me beat by a long shot! They were swirling the hoop on their arms, head, legs, ect all while not missing a beat... unless one of the other kids ran into their hoop.... that seemed to happen often but the girls never seemed to get aggravated when their hula-hoop got hit and knocked to the ground. They hula hooped for a while, every now and then one of the girls would go sit down and then a few minutes later she would be back out there. My daughters wanted a hula hoop so they could hula-hoop dance with them :0) It was an awesome unexpected show to watch! We LOVED it! I got some of it on video and took alot of pictures!!

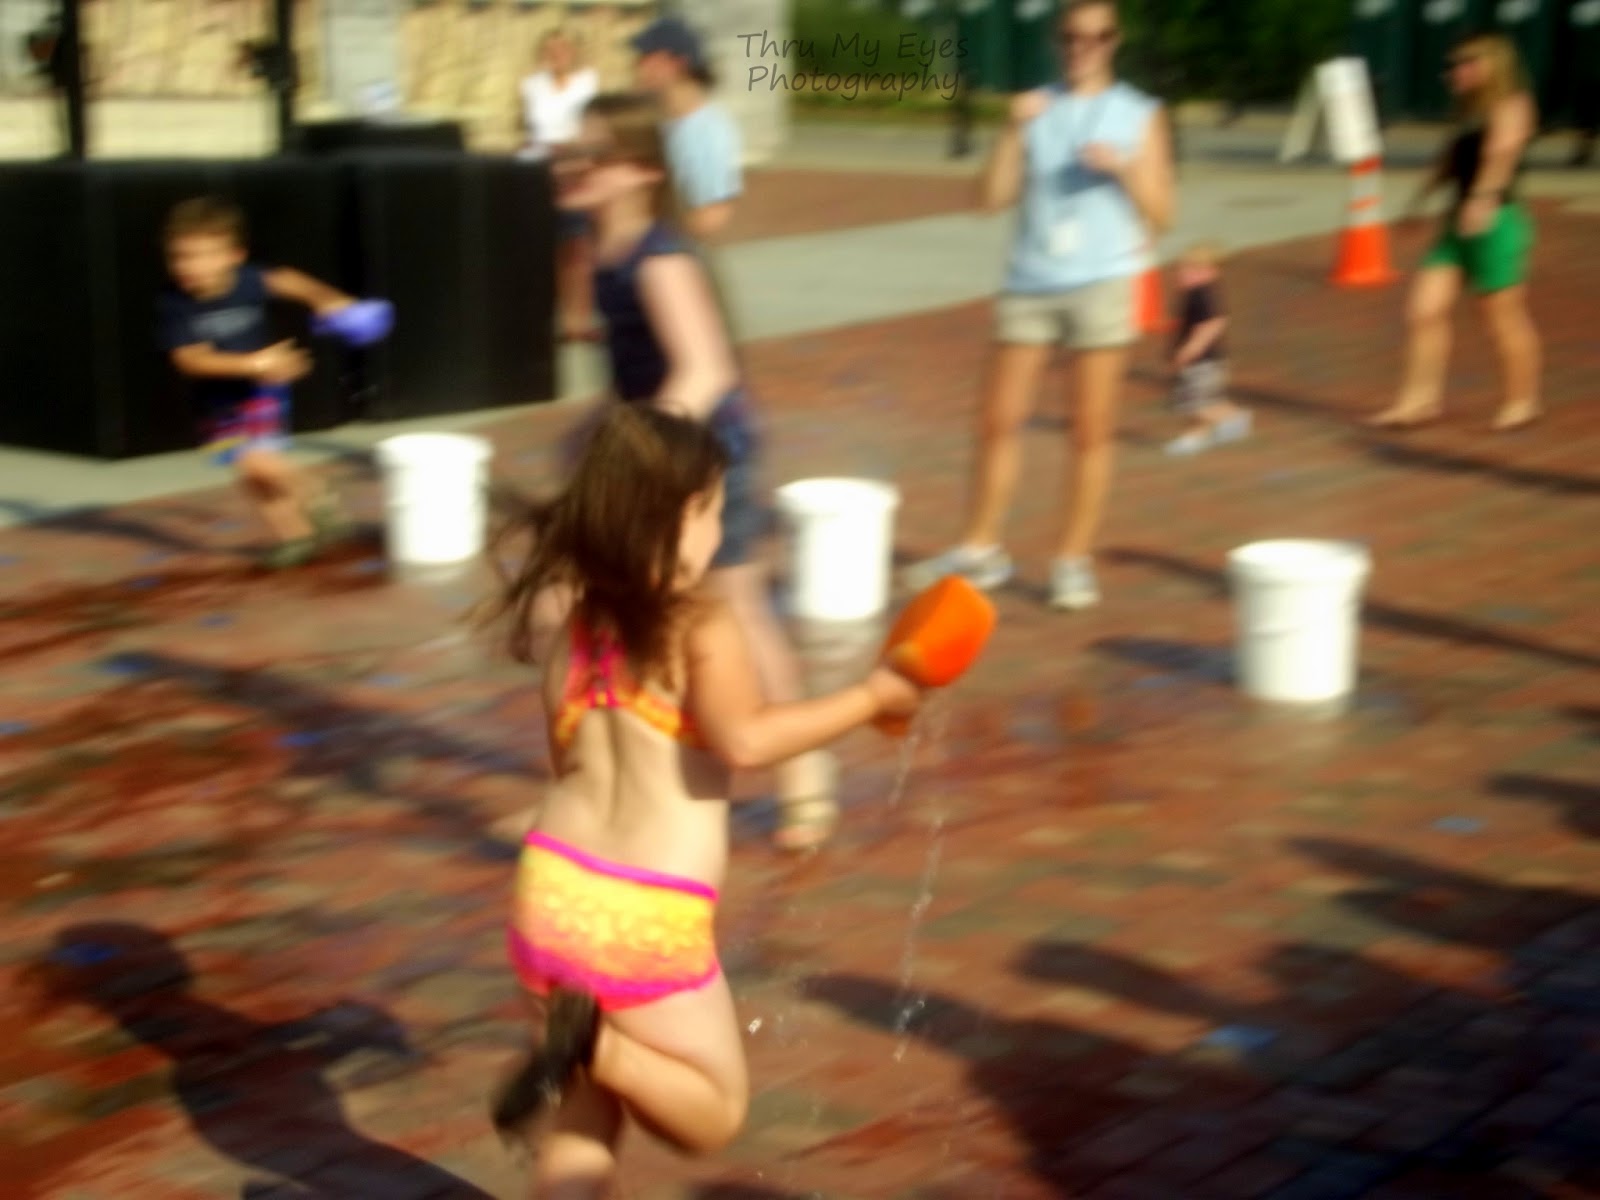
A guy from the music station Star 104.3 was there also. He was the one who announced the bands and done all the talking for the games that were set up every so often for the kids. One of the games was where the kids lined up in 4 lines. There were 4 buckets full of water and had a big sponge in each one. Further down the road were 4 more buckets that were empty with a fill line marked inside them. The point of the game was for each kid, one by one, to fill their sponge with water and run it to their empty bucket, squeeze out their water, then run back to their line and hand off the sponge to the next kid to do the same. The first team to get their bucket to the fill line wins! They also played that same game but with the kids stretched out between the buckets and passed the sponge down the line to the water bucket to get wet and back to the empty bucket to get squeezed out. Another game was with bouncy balls. Each team had 36 balls in a big bowl. One by one the kids would run to the other side of the game area and put their ball into the top of a orange traffic cone! That game took a while before it was over but the kids enjoyed it. They had prizes that were given out to the kids after all the games were over. They were suppose to be to only the winners but all the kids just ram-shacked the girls with the prize bowls and got a prize whither they won or not :0)
They also had craft tables sets up along with face painting. The girls doing the face painting were not the best artists but the kids didn't mind. Once we started walking around, we noticed that since Splashville was closed, alot of the kids were playing in all the random fountains that Asheville has placed around and about downtown. So of course my kids run straight for one and starts playing. It wasn't long before someone walked over and told me to get my kids out of the fountain so we just moved on to the next one :0) I mean , COME ON!! It's 90 something degrees outside and everyone was expecting Splashville to be on, so most of the kids were in their bathing suits anyways! After a bit of water fun we walked back down to the grassy area near the stage and Splashville and sat down and enjoyed the music. Me and my girls got up and danced in front of the stage and on the water platform a few times! We had a BLAST!


The fireworks started alittle after 9:30pm. They were being shot off on the top of a parking deck not to far away. There was only one small tree in our way but the fireworks went up so far in the sky that it only barley blocked a few of the fireworks. I video-taped the whole show but I haven't had a chance to put it on my computer yet, when I do I will be sure to post it :0) After the fireworks, we started the walk back to the car. By that time it was almost 10pm and all 3 kids were sleepy and ready to go home. Ciara, my youngest, did not want to walk to the car but both her daddy and my hands were full so she had to walk anyways which didn't make her to happy but we made it back to our car to find it still sitting in the same spot :0)  No flashing of bank cards needed :0) haha After a long day in downtown, I was happy to be at home. I have to say that 2012 is the best 4th of July we have had yet as a family!! I'm so happy that we decided to go Downtown and spend the day! And to top it off..... we didn't even spend $10 the whole day and had the time of our life's!!!!! We are defiantly planning to return to downtown next year for the 4th of July Celebration once again. We couldn't of made a better choice!!! (Of course we will return way before that for all the fun bars/clubs, diners, shopping and much much more!!!!)
Our 4th of July fun in downtown Asheville!!
*Asheville ~ A city in Western North Carolina known for the Biltmore Estate and called Beer City of America. www.ashevillenc.gov 
*Pack Square ~ Pack Square Park, Downtown Asheville Downtown Asheville's historic Pack Square has transformed into a beautiful public park with 6.5 acres of public space for visitors to relax and linger. In addition to the Roger McGuire Green in front of City Hall and the County Building, the new park has a large open green space on a slope overlooking the main stage, three water features and original, large-scale art by regional artists. There are many seating areas surrounded by native trees and shrubs. A granite Veterans’ Memorial stands near the courthouse at the northeast corner of the park.
I hope you enjoyed hearing about our 4th of July and we hope that your holiday was as wonderful as ours!!
All pictures were took by me and belong to me, Autumn B of *Thru My Eyes Photography*

Monday, July 2, 2012

Cake Ball Flag Cake

 Cake Ball Flag Cake


Step 1--> Heat oven to 350°F. Make and bake cake mix as directed on box for 13x9-inch pan, using water, oil and eggs. Cool completely, about 1 hour.

Step 2--> Line cookie sheet with waxed paper. Crumble cake into large bowl. Add frosting; mix well. Using 1-inch scoop, shape mixture into balls; place on cookie sheet. Freeze about 45 minutes or until firm. When firm, transfer to refrigerator.

Step 3--> In 1-quart microwavable bowl, microwave red candy melts uncovered on High 1 minute 30 seconds; stir. Continue microwaving and stirring in 15-second increments until melted and smooth.

Step 4--> Remove a few balls from refrigerator at a time. Using 2 forks, dip and roll 1 ball at a time in red coating. Return to cookie sheet; immediately sprinkle with red sugar crystals. Dip a total of 28 cake balls in red coating.

Step 5--> Repeat melting instructions for white candy melts. Dip a total of 23 cake balls in white coating; immediately sprinkle with sparkling sugar.

Step 6--> Repeat melting instructions for blue candy melts. Dip remaining 12 cake balls in blue coating; immediately sprinkle with blue sugar crystals. Refrigerate all coated cake balls about 10 minutes or until set.

Step 7--> On serving tray, arrange cake balls in flag pattern in 7 rows, starting from the bottom: 1 row of 9 red balls, 1 row of 9 white balls, 1 more row of 9 red balls, 1 more row of 9 white balls, 1 row of 4 blue balls and 5 red balls, 1 row of 4 blue balls and 5 white balls, and 1 more row of 4 blue balls and 5 red balls. Store tightly covered. Serve at room temperature.

Recipe found at www.bettycrocker.com

Sunday, July 1, 2012

Star-spangled Parfait

Star-spangled Parfait

Colorful layers of flavored gelatin and whipped cream give our light and tasty dessert its banner good looks.
For four servings, make one box each of red and blue gelatin according to the package directions. In tall, clear glasses, alternate layers of red gelatin and whipped topping (we used Cool Whip), as shown. Top with the blue gelatin. (For the fruity version on our cover, substitute raspberries and blueberries.) Finish with a slice of star fruit.

Recipe found at www.parents.com

4th of July Noise Makers

 Noise Makers


Create simple quacking noisemakers, and the kids can be ready for the fireworks or parade.
First, cup two 1 1/4-inch lengths from a plastic drinking straw. Stretch a wide rubber band lengthwise around a jumbo craft stick. Slide one straw piece beneath the rubber band 1 1/4 inches from one end. Lay the other straw piece on top of the rubber band 1 1/4 inches from the opposite end, as shown, then sandwich it with another craft stick. Secure the sticks with more rubber bands. Decorate the noisemaker with stickers if you like.

Craft Found at www.parents.com

Rock Candy Jell-o Shooters

Recipe found at: www.tablespoon.com/recipes

A spiked 4th of July Treat that will make anyone feel like a kid again! (Make sure that if you have kids at the party that you also make a kid friendly version also with water or juice instead of the alcohol ) You can also use others colors other than Red, White and Blue for other celebrations!

 Rock Candy Jelly Shooters

Ingredients

  • 1 3 oz box strawberry gelatin dessert
  • 1 3 oz box berry blue gelatin dessert
  • 3 cups water
  • 6 envelopes plain gelatin
  • 1/2 cup sweetened condensed milk
  • 2 1/2 cups ice cold fruit flavored vodka or rum

Directions

  1. Pour each of the gelatin dessert mixes into a heat safe bowl and set aside.
  2. Pour the water into a medium saucepan. Sprinkle with the 6 envelopes of plain gelatin. Allow to soak for a minute or two.
  3. Heat over medium low heat, stirring constantly, until the gelatin is fully dissolved (about 5 minutes).
  4. Pour one cup of the plain gelatin mixture into the bowl containing the strawberry gelatin mix. Stir for two minutes, or until the red gelatin is dissolved. Repeat process with the blue gelatin. Add one cup of the liquor to each bowl, stir well.
  5. Pour the sweetened condensed milk into the saucepan containing the rest of the clear gelatin mixture. Add 1/2 cup of the liquor and stir well to combine.
  6. Lightly spray 4 1 lb loaf pans (about 8" x 5") with cooking spray. Wipe out with a paper towel.
  7. Pour 3/4 cup of the red gelatin mixture into one of the prepared loaf pans. Repeat with 3/4 cup of the blue gelatin mixture. Divide the white gelatin between the remaining two pans. Place all the pans in refrigerator until the gelatin is set (at least an hour).
  8. Cover the liquid gelatins and set aside.
  9. When the pans of gelatin have set, dice the gelatin into small cubes. (You can cut the gelatin right in the pan).
  10. Mix the diced gelatin and divide as desired between two of the loaf pans. (I had two pans that were predominantly blue, and two that were predominantly red cubes.)
  11. Grab the liquid gelatin (if it is starting to set up, microwave for 10 to 15 seconds - just long enough to soften, not warm the gelatin - and stir thoroughly). Pour the liquid gelatin, red in one pan, and blue in the other, to fill about 3/4 of the way up the gelatin cubes. (You may have a little liquid gelatin left over.) Return pans to refrigerator and allow to set for several hours or overnight.
  12. Remove pans from the fridge. Cut around the edges of the pan, and invert the gelatin slabs onto a non-stick surface for cutting.
  13. Cut the gelatin into 3/4 to 1" strips, wiggling your knife to give an uneven edge (like rock candy). If you cut the strips too thin, they will break when skewered.
  14. Skewer each strip with a lollipop stick - hold the gelatin gently at the sides, and insert the stick almost all the way to the top. Place on a non-stick cookie sheet and chill until ready to serve!